
I’m not the world’s best DIYer, so when I find a project that I can actually pull off, I get really excited! And if I can get my toddler involved, it’s even better. That’s what happened with these DIY bookmarks and they ended up being a huge hit (both for my toddler and everyone that got the bookmarks).
The first ones I made cost me barely anything. After doing a few, I decided to get a laminator (Amazon sells them for $20 so it wasn’t a major investment) and added a few charms, but that was really all I paid for! The rest you will most likely find right at home.
Here’s what you need:
- Printer paper
- Crayons
- Laminator OR clear (wide) packing tape
- Hole puncher
- Ribbon, string, or twine
- Charms (optional…I added these to some)
Design Your DIY Bookmark
There are a ton of cool bookmark designs that you can find on Pinterest to print, but I wanted to make mine personalized, so I used PicMonkey (it’s free) to design my bookmarks.
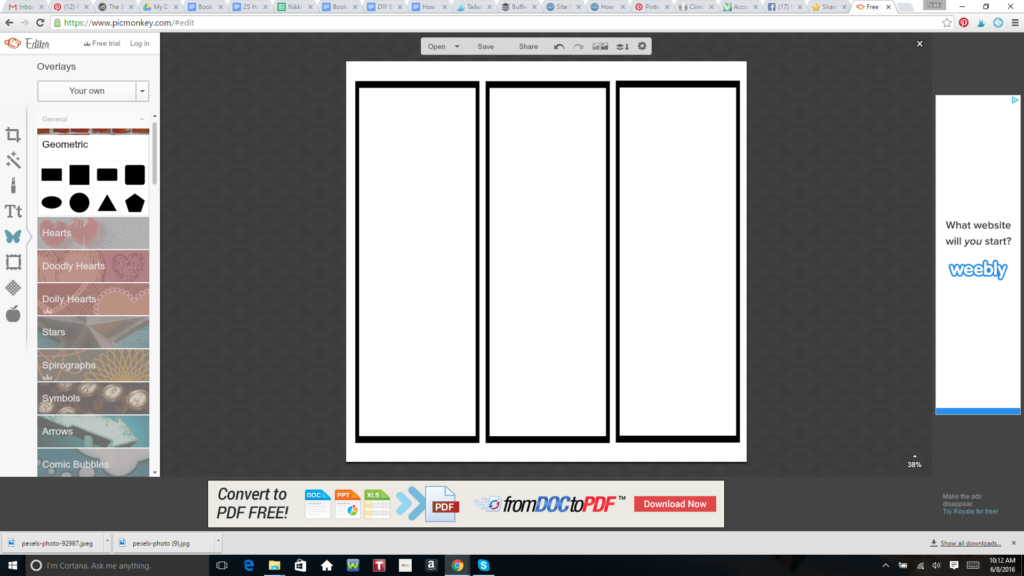
To do what I did, head to PicMonkey, choose the Design option, and leave your canvas white. Then click on the butterfly icon to get a bit list of shapes and clip art. Choose the geometric shapes and pick the rectangle. Once you add that, you will want to play around with it to make it the size you want (I did 3 to a page). You will also want to change the inside color to transparent or white.
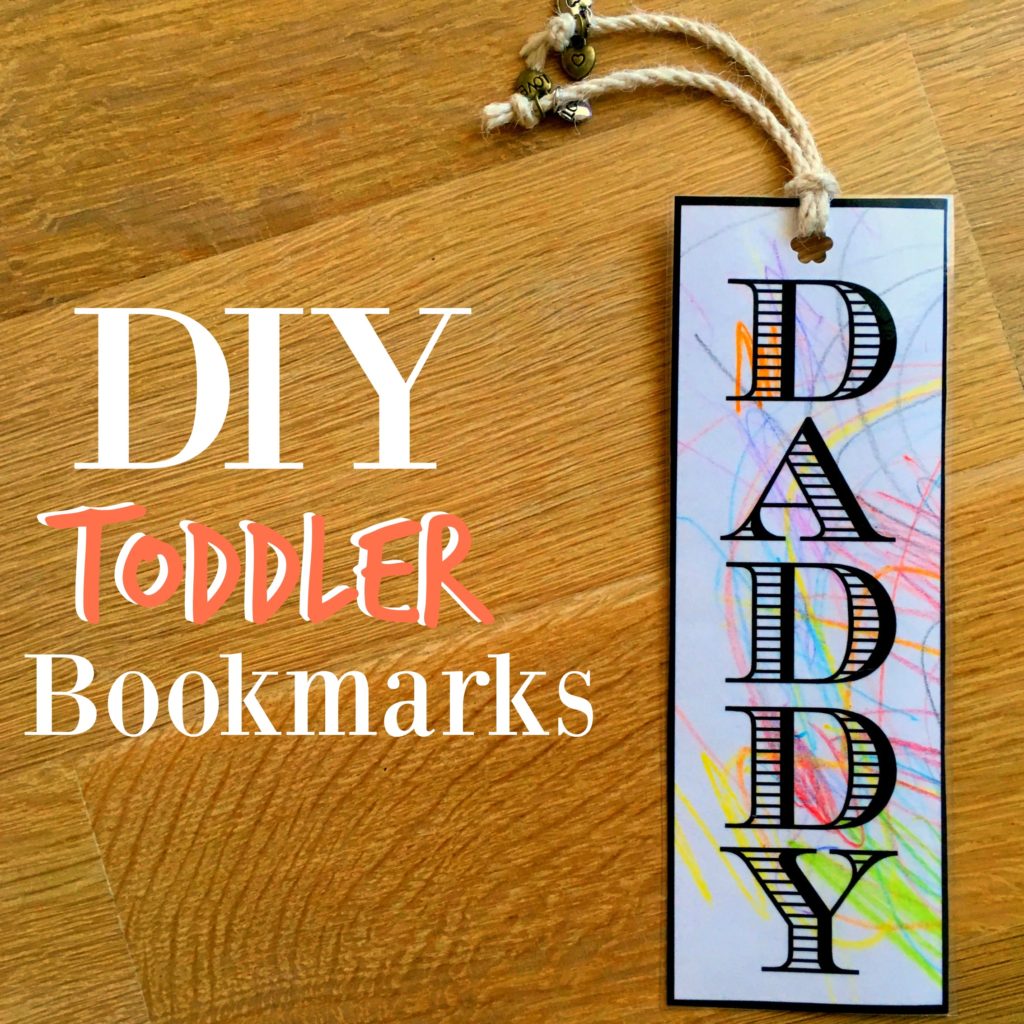
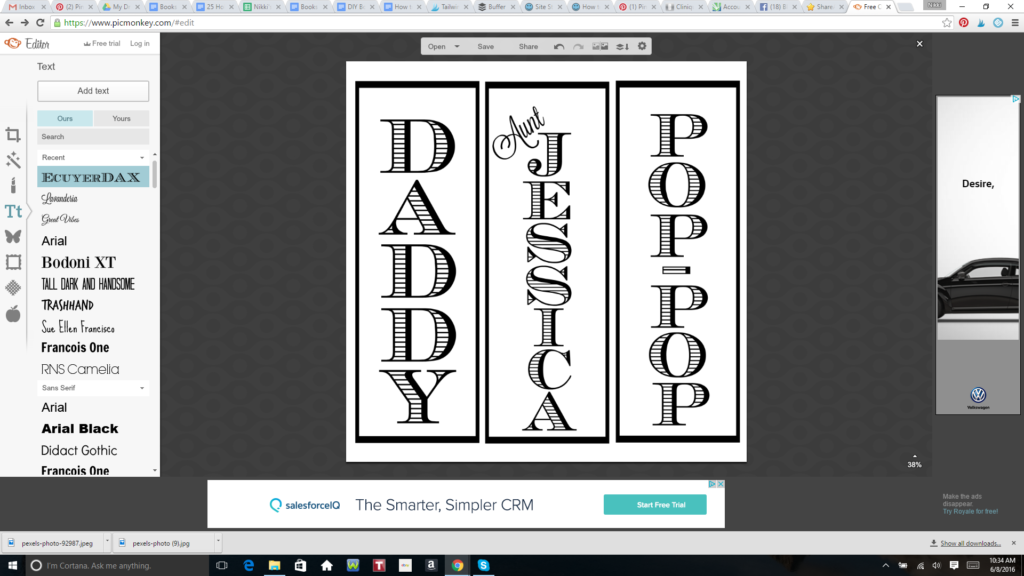
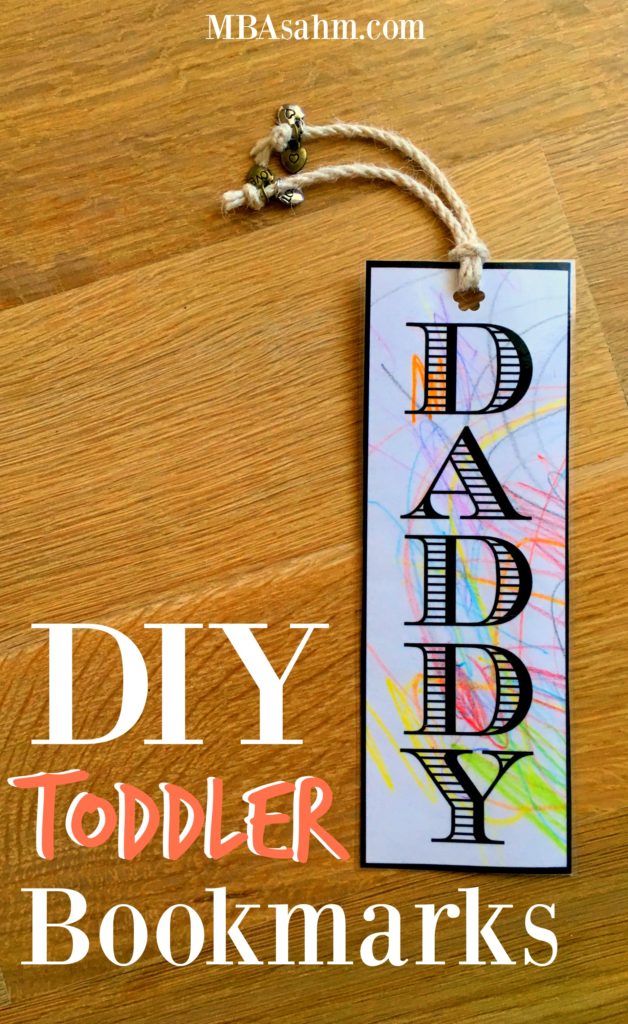
Then head over to the Text section (Tt) and start adding your letters! You can also add other images or designs. Whatever you think will be fun! I like using EcuyerDAX font because it still shows the crayon colors.
Create Your DIY Bookmark
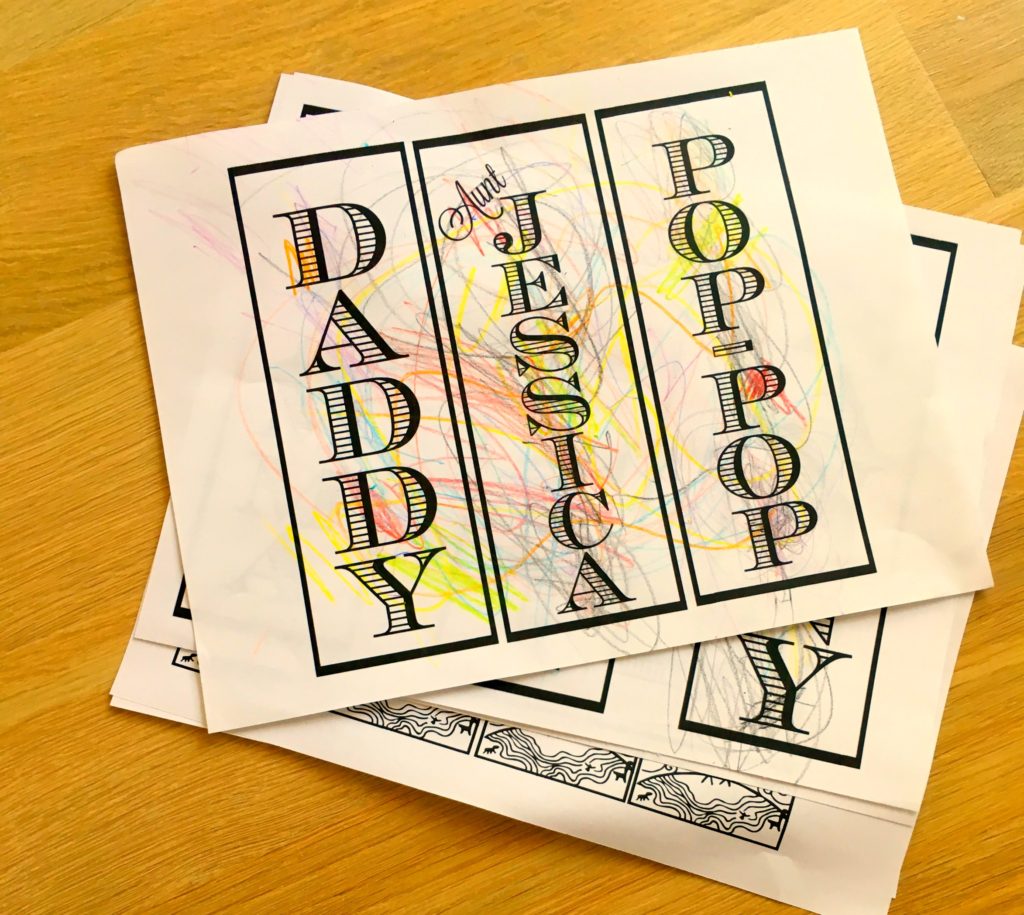
Once you’ve finished your creation, you’re ready to print! The next step is easy. Get your crayons out and let your toddler go at it! I used this as an opportunity to go over letters too, so I sat with my son and prompted him to color specific letters. He had tons of fun with it and they turned out great.
The next step is to cut out each bookmark and start the laminating process. If you are using a laminator, you can fit three bookmarks to a page. Just make sure that you leave enough space to cut. If you don’t want to use a laminator, you can carefully use packing tape to “laminate” the bookmarks.
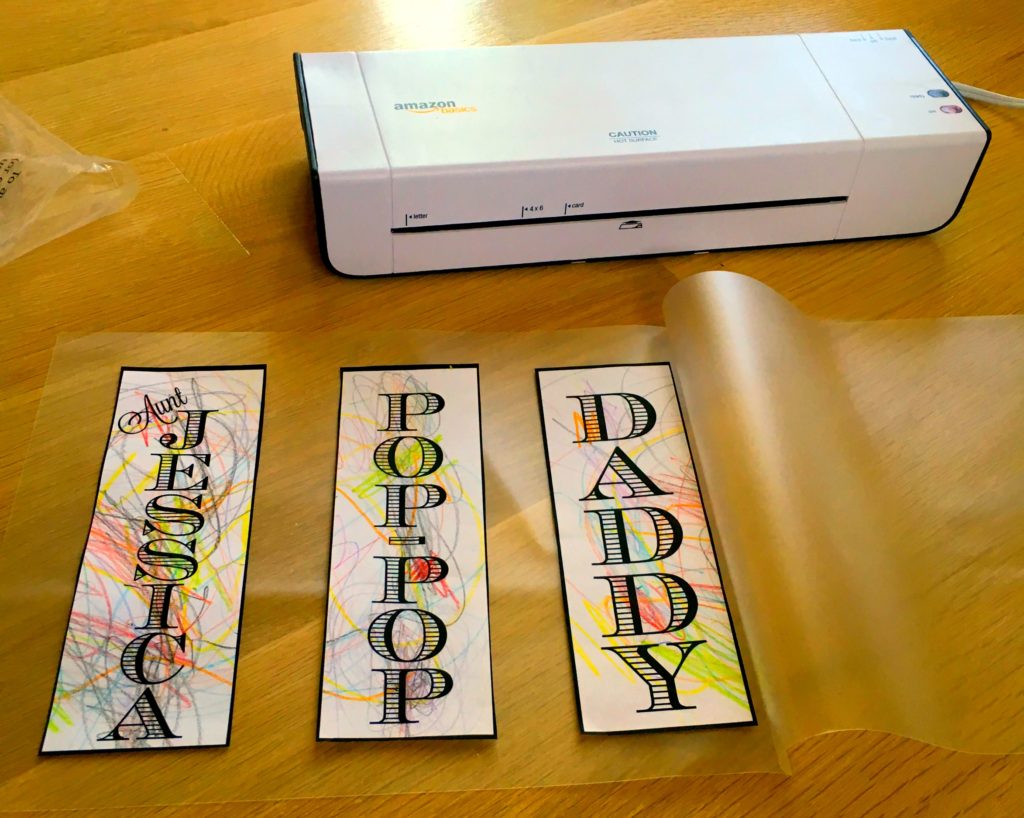
Once you have laminated or taped your bookmarks, you want to cut off extra material, leaving just a tiny border of laminate and/or tape. Next step is to carefully punch a hole at the top of each bookmark.

Once you have your bookmark with hole, you can add string, ribbon, and/or charms as the final touch!
Hope you have fun with these DIY bookmarks! Good luck.
1 Comment on How to Make DIY Bookmarks with Your Toddler
Comments are closed.
These are cute! I’m always on the lookout for more things to do at home with my toddler. Thanks!